
Window Trim and Curtains – Tips and How To (It’s a long one!)

Happy New Year Everyone! I can’t believe that it’s been two months since I finished the laundry room. To be honest, between that project and the holidays I didn’t start the New Year off to a roaring start but took some much needed downtime to re-charge and finish up some necessary but boring tasks around here – which weren’t blog worthy but felt really good to finally check off the list! I did take the time to fit in one bigger project and finished framing the windows in my morning room and added some new curtains so instead of just sharing the finished product I thought it might be helpful to share my process with a few How To steps and some tips.

There are a lot of How To’s out there for how to add window trim, but this is the way that works best for me based on my needs. I use straight edge MDF trim pieces for everything except the windowsill (which is basic pine) because a) I can get them pre-primed in white and b) they are perfectly straight. First I start out by measuring my windows, adding the width of my frame pieces, and then extending to length of the windowsill and lintel (which both extend past the framed width by 1/4″ on each side).
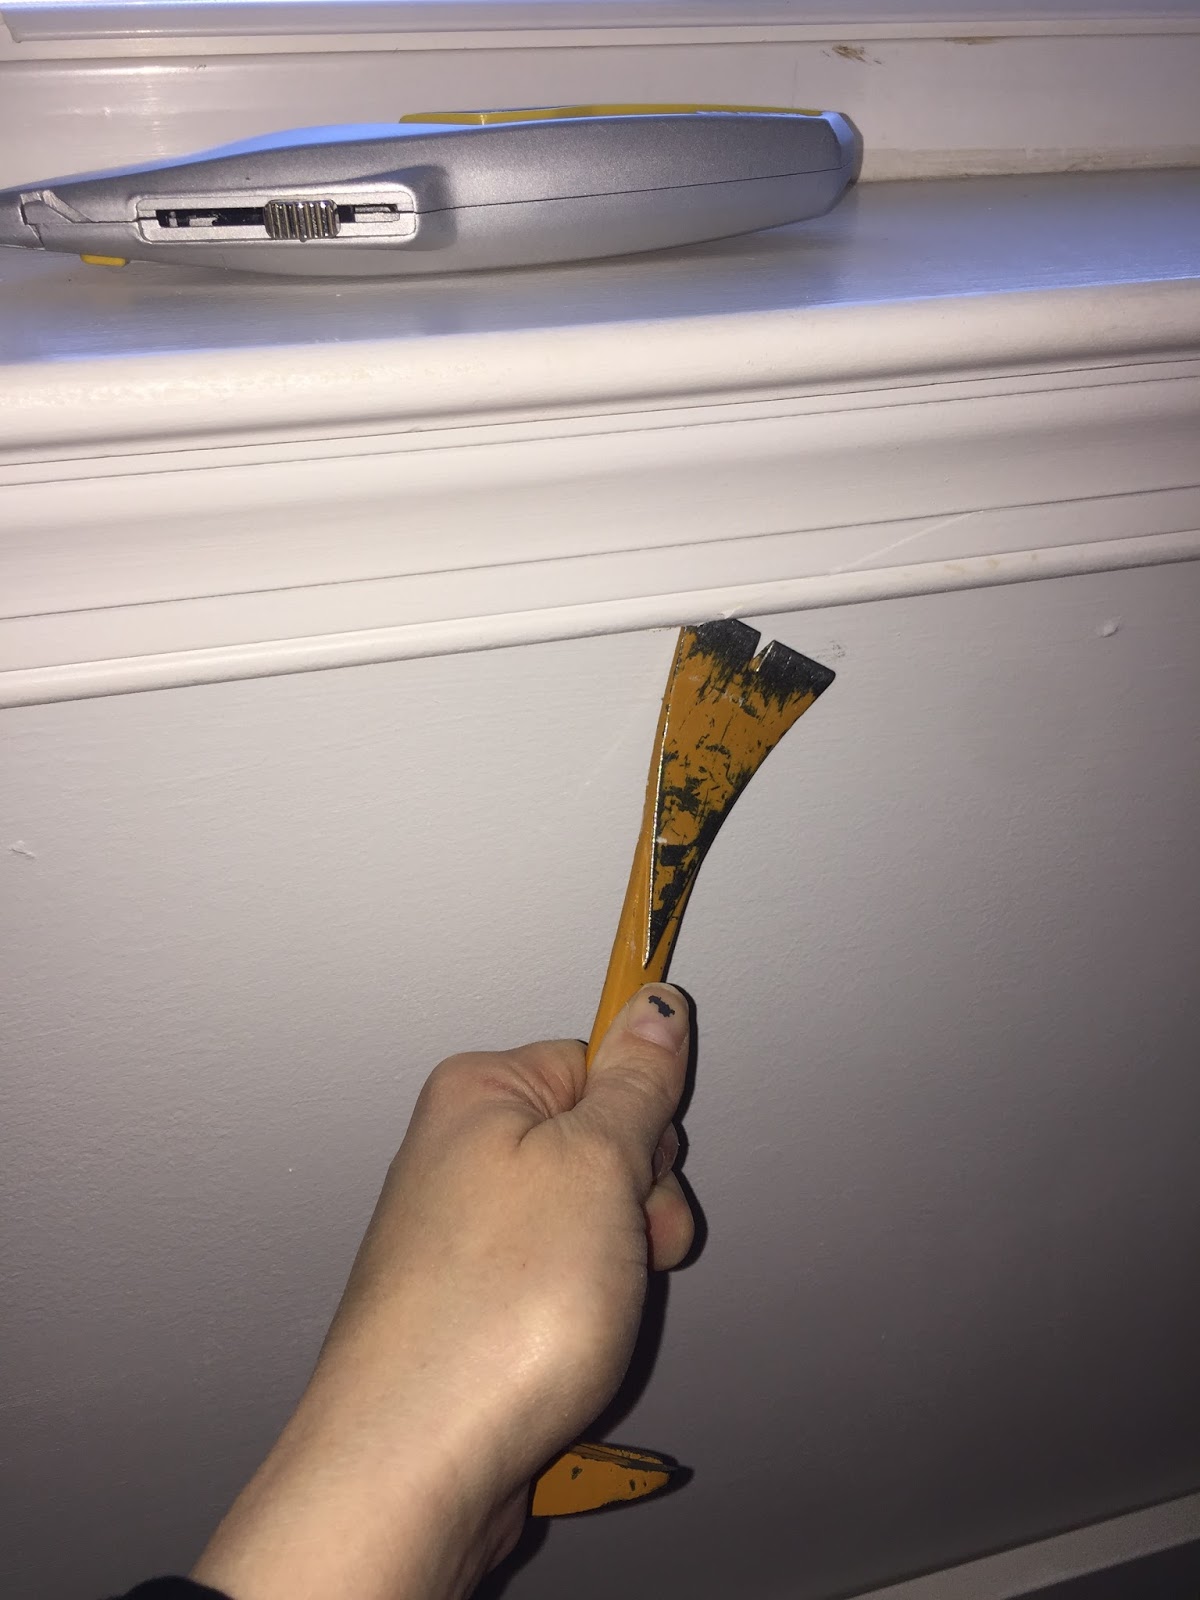

Next, I rip out the existing trim and windowsill. I have a small dual-sided trim remover that looks like a tiny crow-bar and it is excellent for removing trim without damaging your wall. You can also use the opposite end (which looks like the backside of a hammer) to remove the nails. My sills are just nailed into the bottom frame so I can pry out very easily.

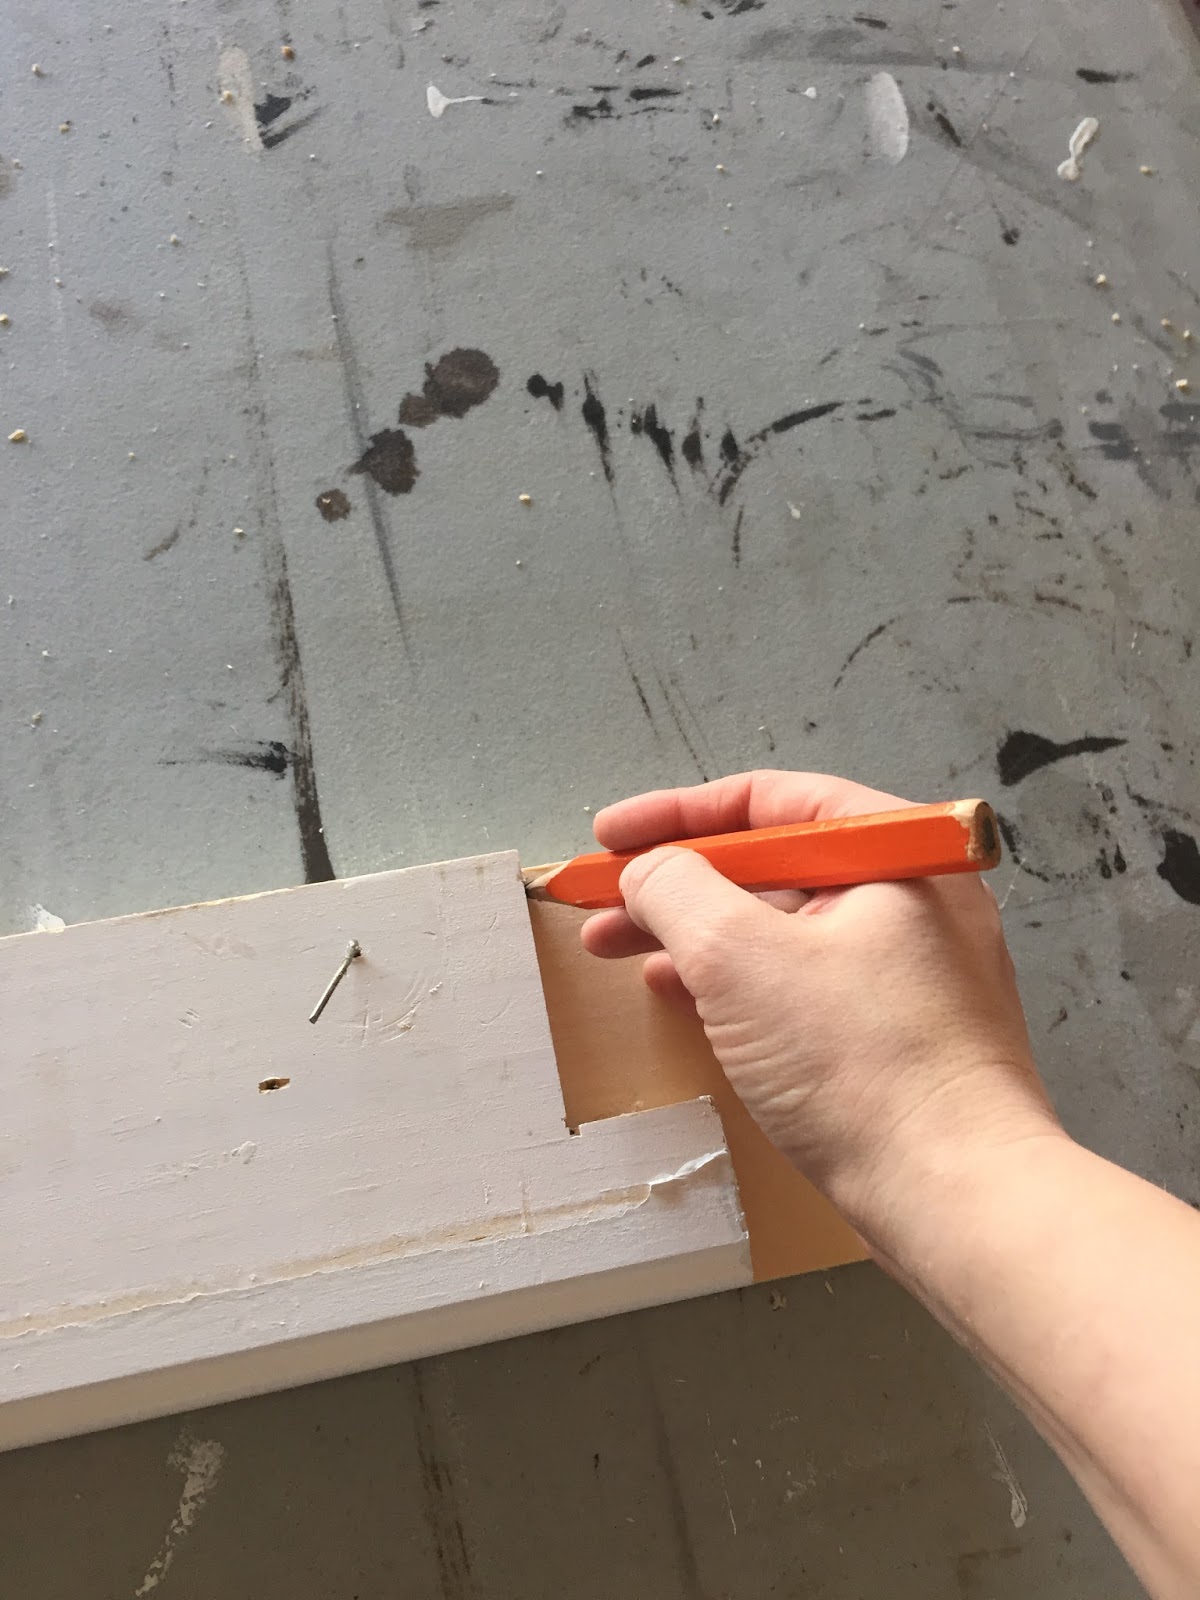

I use the original sill as a template to cut my new piece of 1×5 pine. I find the middle of both pieces, line them up, and trace the indentations on both sides. Before I’m done with the windowsill, I use my miter saw to cut out a few thin pieces that I can use to install the new piece (you can see them sitting above my piece of pine in the above picture)
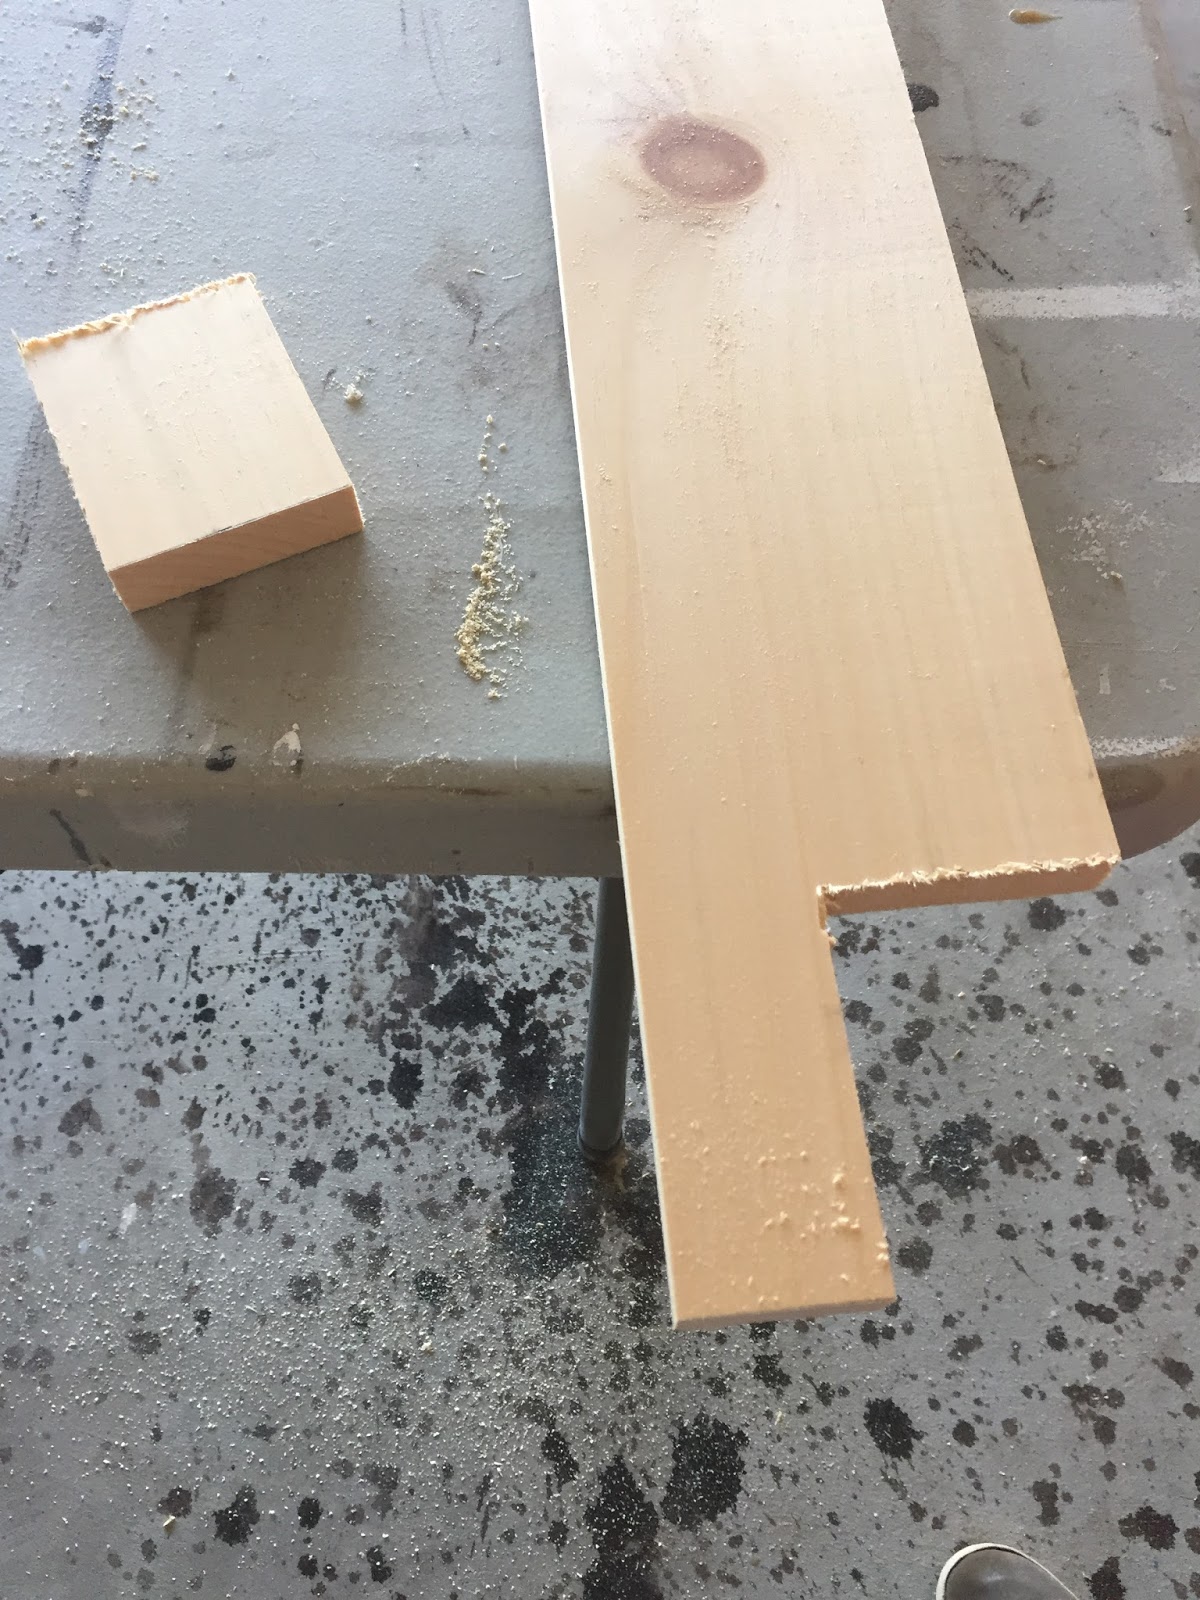
Next, I use my jigsaw to cut out both sides and sand down any jagged pieces.

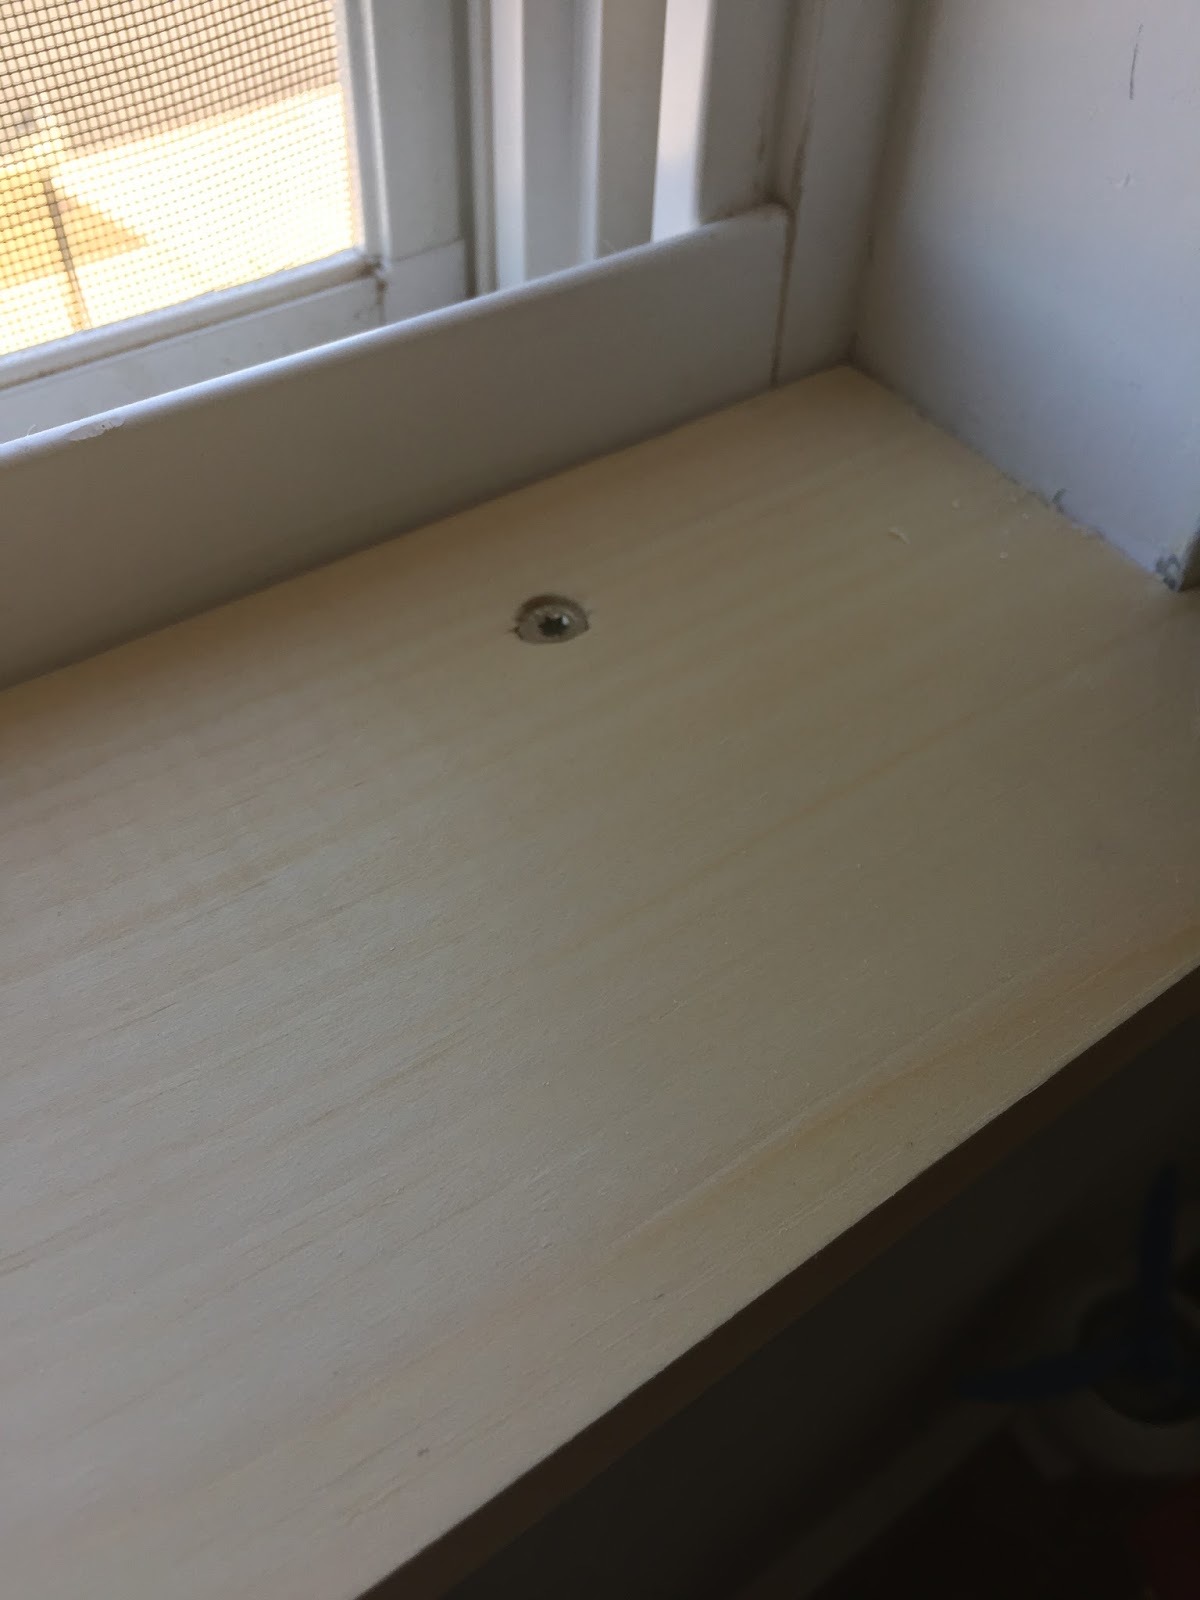
To install, I first lay down my thin pieces of the old sill to use as a spacer (I like to use three, one at each edge and one in the middle). I use 2 1/2″ SPAX screws instead of nails to re-install my new windowsill – SPAX screws are a little pricey but wonderful for installations like this because you don’t have to pre-drill. For my smaller windows I find that I only have to use 2 screws (one on each edge) but for larger windows I add a third in the middle – make sure that you are drilling through your spacers for more stability.

For the rest of the window, I apply some construction adhesive to the back and attach with 1 1/4″ brad nails and my nail gun. Next I fill in all of my holes with wood filler. I use a coat of primer on the windowsill and a small swipe everywhere that I used wood filler. Next I caulk around EVERYTHING, followed by 2 coats of Sherwin Williams pro-classic Semi Gloss paint in Extra White. The final step is to use my wall color and an angled brush to finish off the outside edges of the window. And, PHEW!!!, you’re finally done. I have used the same materials and basic steps to replace all of the floor and door trim in the house and while it is VERY time consuming, the clean straight edges are exactly what we want.

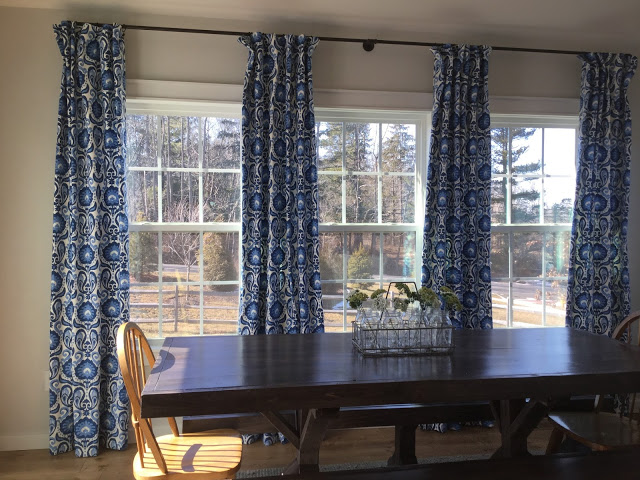
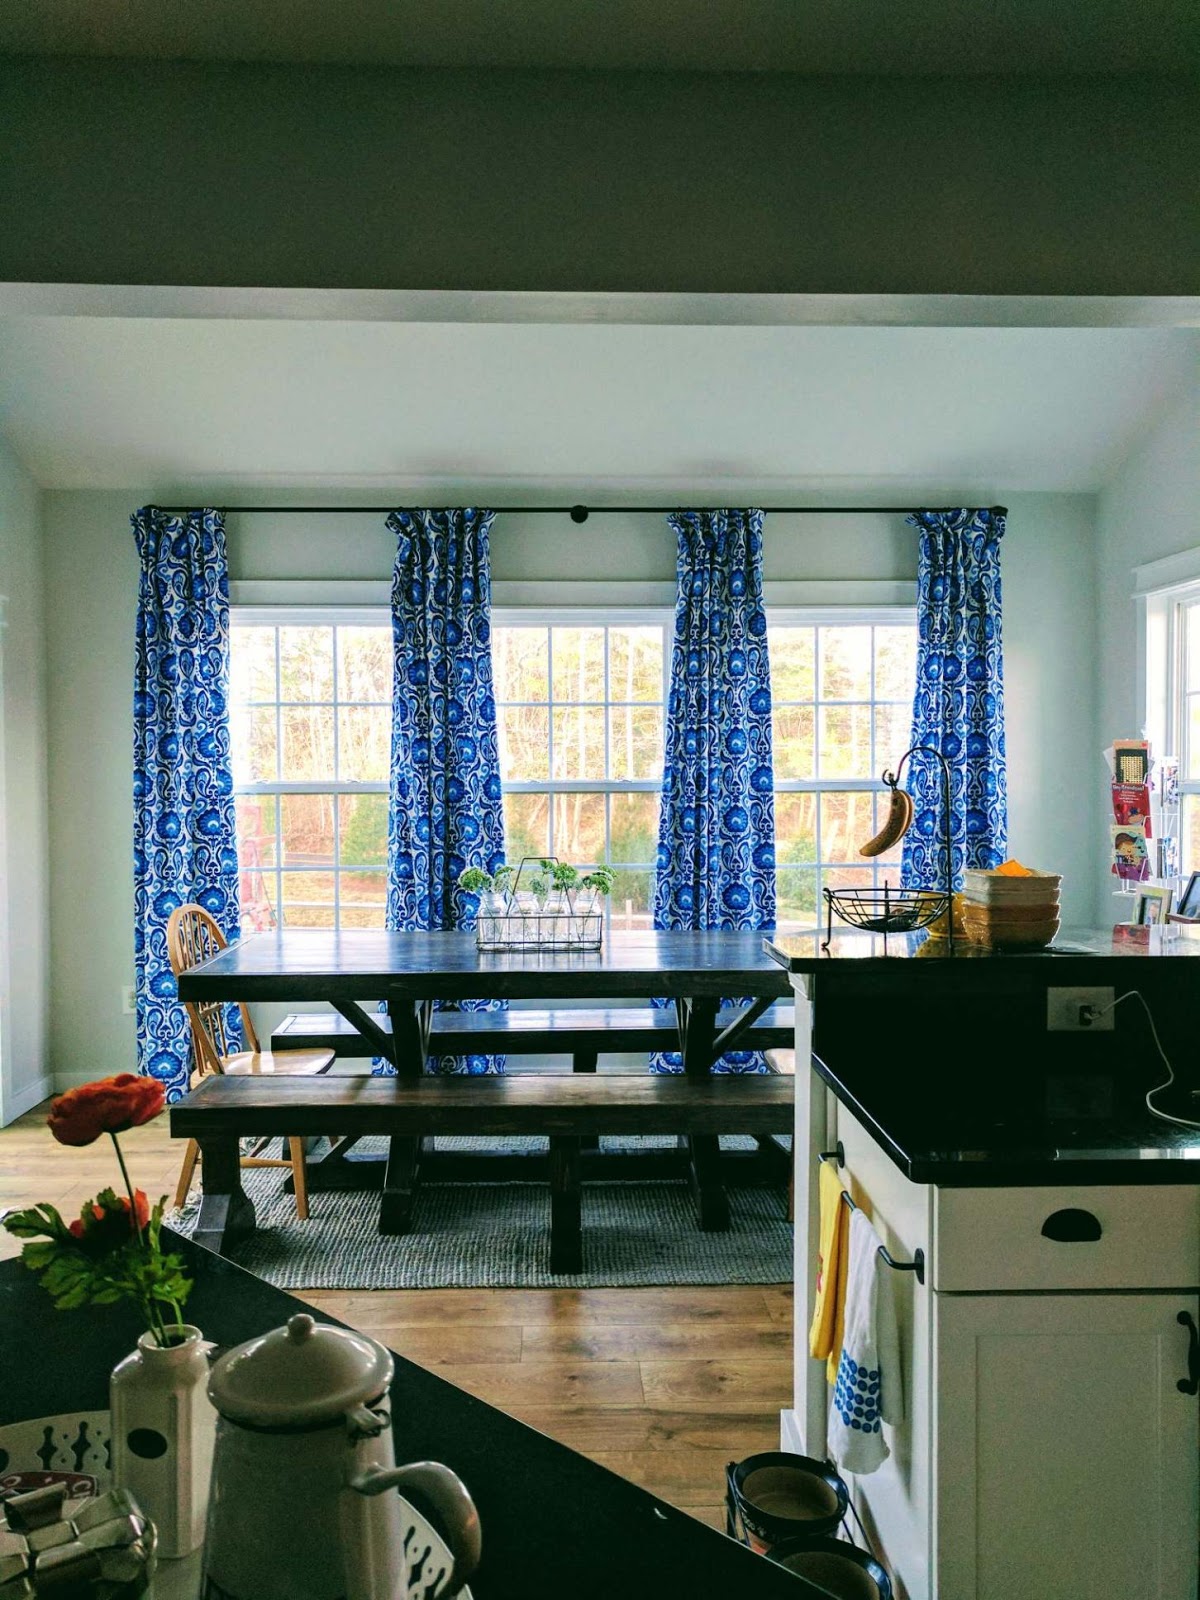
For the curtains – I bought my material from this site after searching for a while to match a picture that I found on pinterest with these awesome Navy and Blue curtains. I followed the steps in this great tutorial pretty closely, except I used two sets of white curtains from IKEA instead of twin flat sheets – they’re a lot lighter and were actually a lot cheaper than anything else I could find. I’m really happy with how they turned out (I also realized how much I missed my sewing machine!)
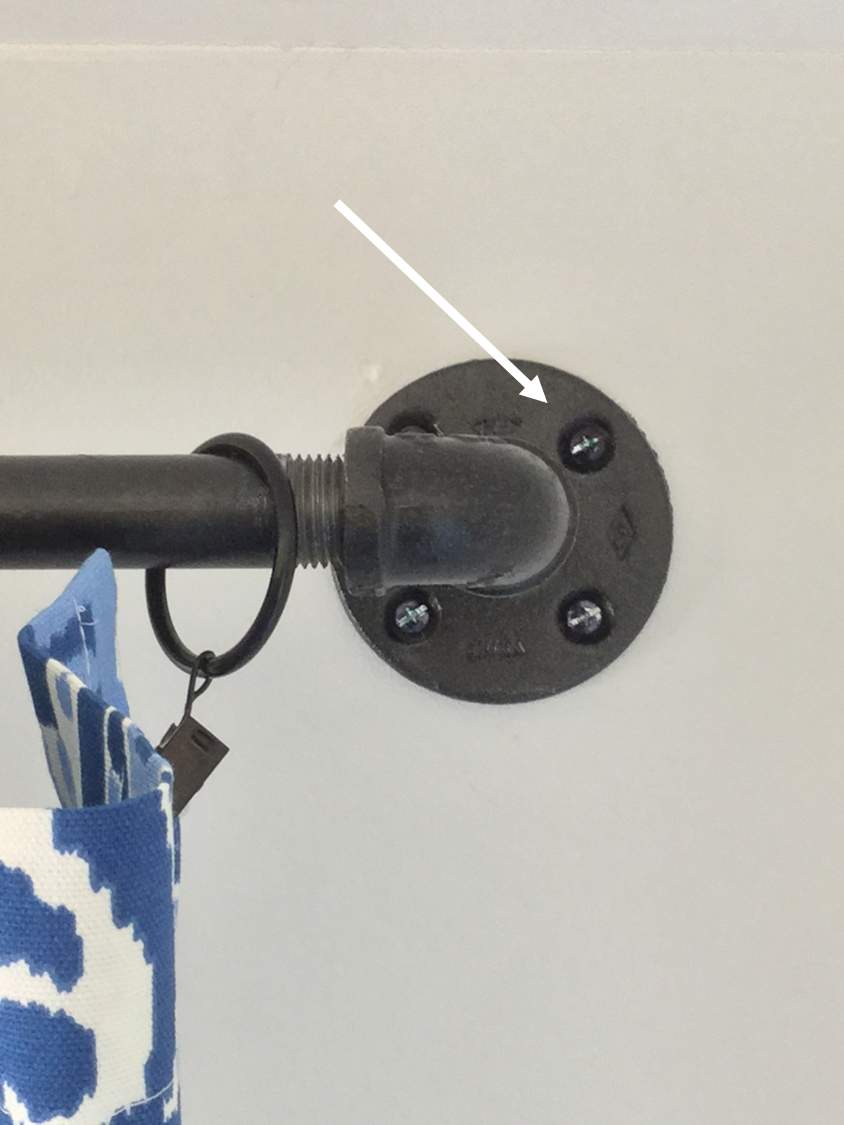
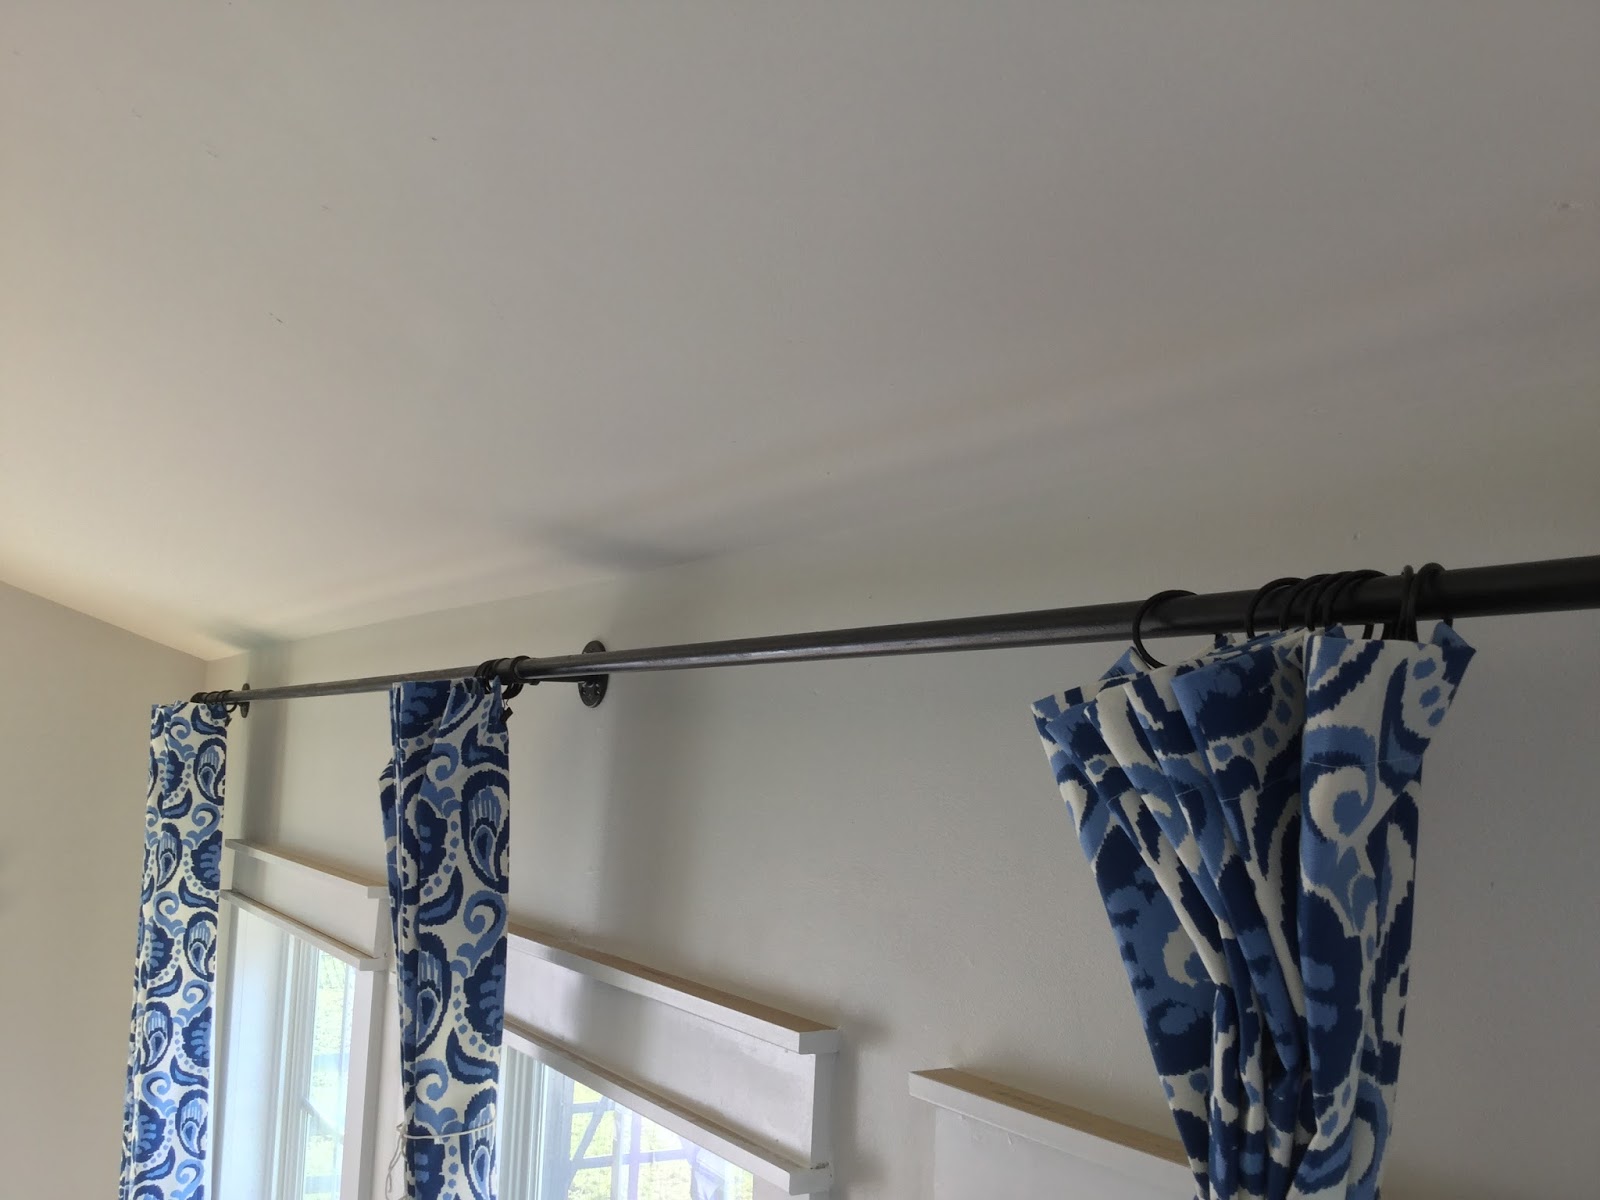
To hang them, I knew I wanted to use the same black pipe that I use to make my shelves (check out this post for those step-by-steps). This was a little tricky as the morning room window is very long and needed to have a center support, which I anchored to the wall first and then temporarily attached the side pieces to mark out my placement for the side supports. As I learned with my laundry room, it is very important to make sure that you can reach the screws with your drill bit once the pipe is in place or you will end up having to screw them in by hand (thanks again husband for your help on that one!) To help resolve that issue I did two things – 1) I made sure the screw holes did not line up directly with the pipe but were all on a 45 degree angle (as in the picture above) and 2) I invested in a longer drill bit that I will put to good use on the rest of the windows. IMPORTANT NOTE: Make sure that you thread your curtain clips on the pipe before you anchor it to the wall (and then double check!!).

After I attached my curtains to the clips, I tied them up with some kitchen twine to help the create the folds and let them sit for two days.

Then – finally! – we were able to start enjoying dinner in this room again. It is crazy how much “character” trimming your windows adds to your house…when I look at these windows compared to the ones that are still bare it’s the difference between looking at something that feels like a lived in home and one that’s still a model house. The curtains are super dramatic and add so much life to the house! The last two years have been about building a very calm and neutral color palate, but now it’s time to start adding color and pattern. Because you can see them the second you walk in the front door I wanted to get them up before making any more decisions for the first floor. And if I can offer one more piece of advise – listen to the professionals and hang your curtains floor to ceiling and not right about the windows….it’s incredible how much bigger your room will look with that one simple change.

I’ve got about 4 rooms in progress right now and have some big plans on the horizon in the coming year and now that the weather is beginning to change I can start to spend some time in my garage and get those plans in motion. Here’s to a recharged spirit and an eagerness to keep stretching my skills!

Comments
Great work!! Super inspiring to get my act together!
Just found your blog – amazing work! Makes me want to tackle my house! One quick question … the link for the fabric takes me here https://s-media-cache-ak0.pinimg.com/564x/df/d3/d4/dfd3d47d75d4ce5a47bfcd05d25eebd5.jpg What actual site did you use? Thanks!
Hi Sandra! Thanks for stopping by and for the awesome feedback : ) Sorry about the broken link, the site I used was "Online Fabric Store" and the link to the fabric is below:
https://www.onlinefabricstore.net/golding-grand-ikat-blue-fabric-.htm
Thank you!!! ;D