
A Major Mudroom Upgrade
I have one over-reaching goal this year when it comes to my own home and that’s to bring in more color and more pattern. Our old townhouse was a little all over the place it terms of color so when we moved into this home I went in the opposite direction and kept the walls very calm and neutral. Looking back I still definitely think was the smart thing for me to do because it helped me slowly grow into my own personal style — which leads me to my latest project and the power of WallPops! Peel and Stick wallpaper to turn this boring mudroom into something really magical.
This blog post is a paid collaboration with WallPops! Peel and Stick Wallpaper. All reviews and opinions are my own.
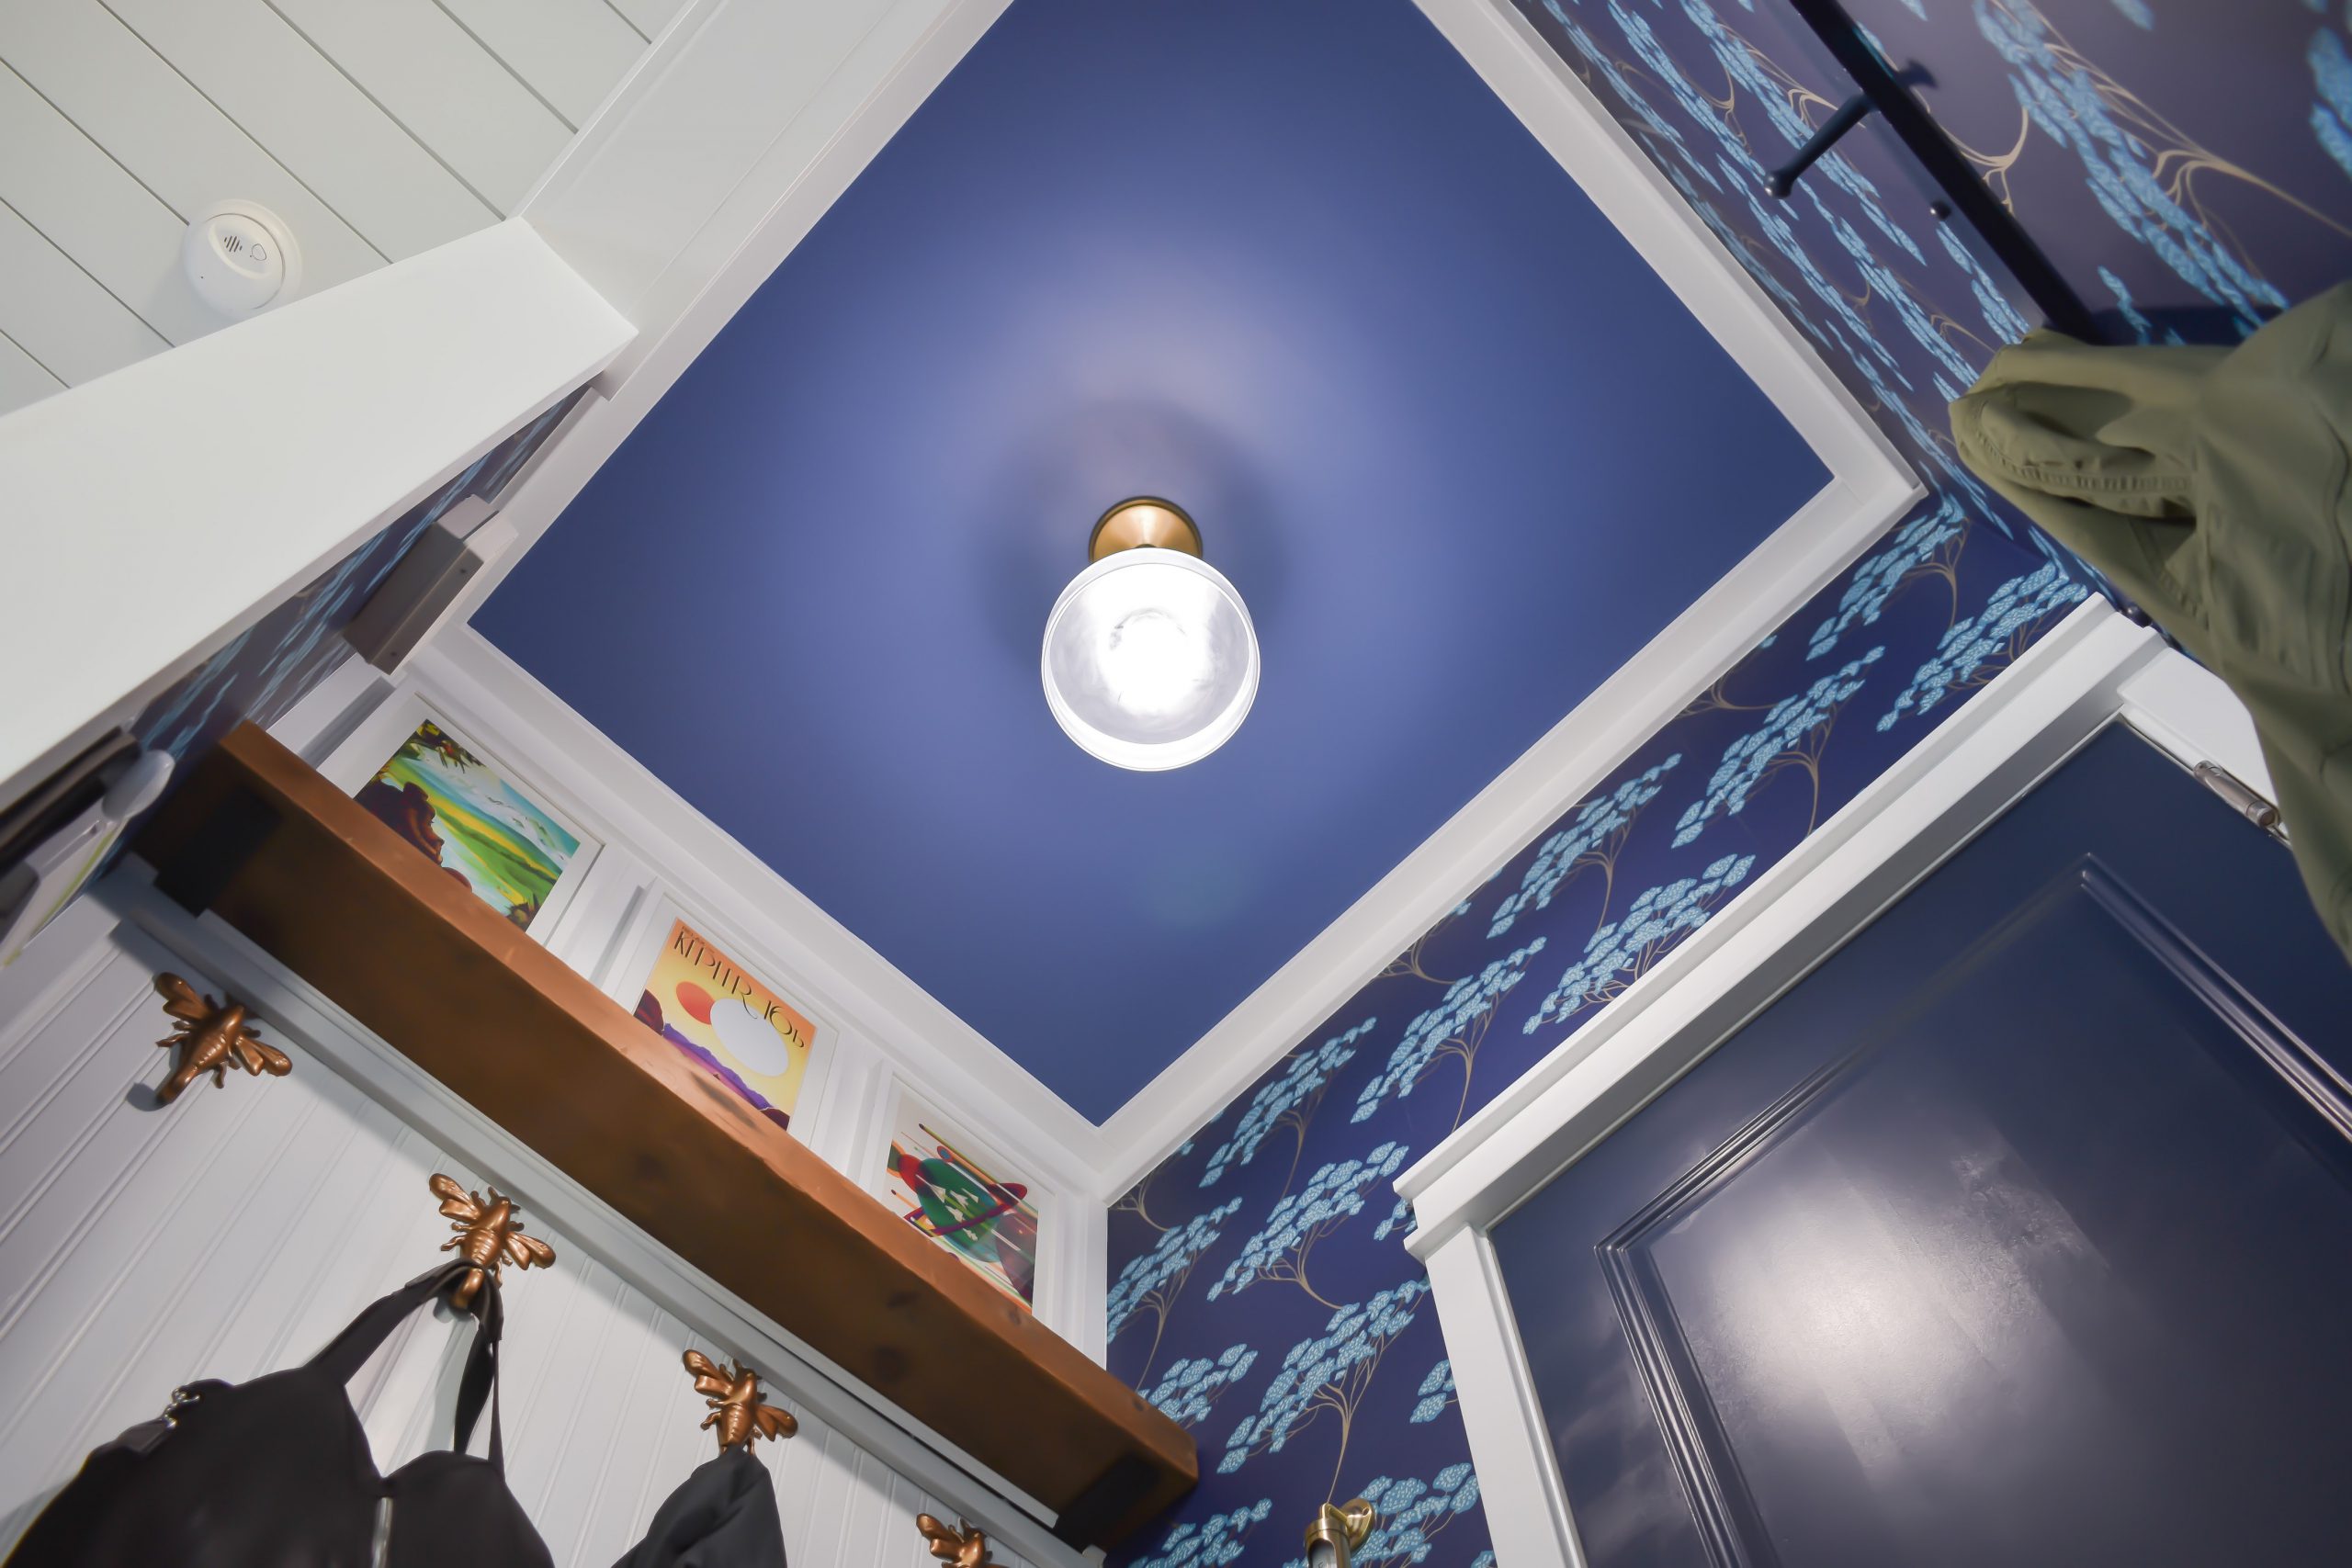
There are a few smaller spaces that I have pegged in the house to have some fun with, and the mudroom was top of the list. The boys had outgrown the chalkboard and the garage door paint was peeling due to the fact that I didn’t prep it properly the first time. In an act of incredible timing – I had just started to look at possible wallpaper patterns when Brewster Home Fashions reached out to me about a possible collaboration. After trying out a few samples I decided to go with a beautiful deep Blue Ficus pattern from their WallPops! brand.


I had used Peel and Stick wallpaper on a few previous projects and have picked up a few tips from my experience:

- Make sure you check the manufacturers installation instructions to make sure that it will work with your wall texture. The quality control team at WallPops! suggested that I hang the sample I had up for two weeks prior to install to make sure that it would adhere OK – which was a great idea and made me confident that this was a good fit for my space.
- Make sure that your walls are smooth before you install because any imperfection will show throw. For this room that involved sanding and priming the former chalkboard wall –which was MESSSSSYYYY and something I do not wish to again
- Something I didn’t do and in retrospect that I should have was to paint the wall the matching color blue before I tested out the sample! So learn from my mistake friends.
- Go slow and don’t be afraid to remove and re-attach your paper as you go. One of the nicest things about using Peel and Stick wallpaper is that you can remove and reposition it as many times as you need to get the pattern to line up straight so take advantage of that feature as you install.
- Be careful not to scratch the print! Especially with darker colors – any scratch will show so be careful when you are smoothing it out and cutting any corners.


To go with the deep blue background of my WallPops! paper – I decided to paint the door in a matching color and chose Goodnight Moon from Clare Paint. After I peeled off the old paint, I made sure to prime the door with Sherwin Williams Extreme bond primer first. I can already tell that the final finish is infinitely better than the old one!


I debated painting the ceiling the same color, but thought it would make the room look too dark, so I went with a slighter brighter shade of blue called Blue’d Up (It actually feels like it has the slightest bit of purple in it which feels super fresh and is a great contrast to the gold light fixture). And speaking of ceilings – the addition of the wallpaper instantly made this room feel like it grew 2-3 feet…..basically it feels like the portrait room in the Haunted Mansion at Disneyworld.

To replace the chalkboard, I added a really simple peg-rack painted the same color as the door to double the number of hooks in here. My original plan was to add a gallery wall on the top half of the wall, but the WallPops! wallpaper feels like a work of art on its own so I ultimately decided to leave it as is and let that beautiful pattern shine.


For the rest of the space I left most things alone because I knew that the layout worked really well for our family. Instead I chose to give some of my earlier projects a little upgrade. Staring with the new bench to replace the cute, but very very wobbly old one. The wallpaper really reminds me of paintings of Japanese gardens, so I built a new one reminiscent of a simple garden bench (and since it’s made out of cedar it could potentially live in the garden one day).


The other major changes were the new upper shelf (which I made out of an amazing piece of reclaimed wood I found at the antique store), a new rug that I think will hold up to snow boots and cleaning better, and the casing around the door frame which ties this room into the rest of the hallway and will hopefully save the walls from additional dings and nicks.


Since this space is so tiny we don’t necessarily spend a lot of time in here, but every time I walk down the hallway into the kitchen I catch a glimpse of the new wallpaper poking out and I get extremely excited about the possible places to add more fun WallPops! wallpaper to other places in hte house (I’m looking at you laundry room!)
-
-
1 month
Tagged better homes and gardens, diy, organization